How to Choose and Install an Acrylic Insert for Your Bathtub
Acrylic inserts for baths have become increasingly popular due to their many advantages over other materials. Acrylic is a durable and lightweight material that is easy to clean and maintain. It is resistant to scratches and chipping, making it ideal for high-traffic areas such as the bathroom. In addition, acrylic inserts come in a wide range of colors and designs, allowing you to choose the perfect one for your bathroom.
When selecting an acrylic insert for your bath, there are a few important factors to consider. First and foremost, you need to make sure you choose the correct size. Measure the dimensions of your bath carefully to ensure a proper fit. It’s also important to consider the thickness of the acrylic insert. Thicker inserts tend to be more durable and have better heat retention properties.
One of the main advantages of acrylic inserts is that they can be easily installed without the need for specialized tools or professional assistance. To install an acrylic insert, start by cleaning the surface of your bath thoroughly. Remove any old enamel or paint using sandpaper or a chemical remover. Make sure the surface is smooth and dry before proceeding.
To ensure a secure fit, apply a layer of construction adhesive around the perimeter of the bath. Carefully position the acrylic insert in place and press down firmly. Use clamps or straps to hold the insert in place while the adhesive dries. Once the adhesive has set, remove the clamps and clean any excess adhesive with a damp cloth.
It’s worth noting that the installation process may vary depending on the specific type of acrylic insert you choose. Some inserts come with detailed instructions, while others may require additional steps or materials. If you’re unsure about the installation process, it’s always best to consult a specialist or refer to a video tutorial for guidance.
In conclusion, choosing and installing an acrylic insert for your bath is a straightforward process that can greatly enhance the appearance and functionality of your bathroom. By selecting the right size and thickness, properly preparing the surface, and following the manufacturer’s instructions, you can easily achieve a professional-looking result. Remember to prioritize safety and consult a specialist if you encounter any difficulties during the installation process.
Why choose acrylic for restoration?

When it comes to restoring your bathtub, choosing an acrylic insert can be a great option. Acrylic inserts, also known as liners, are custom-made to fit over your existing bathtub. They are made from high-quality acrylic material, which offers several advantages over other materials used in the restoration process.
Here are 3 reasons why you should consider choosing an acrylic insert for your bathtub restoration:
- Durability: Acrylic is a highly durable material, resistant to cracking, chipping, and fading. It can withstand heavy use and is less likely to develop stains or discoloration over time. This makes it an ideal choice for a long-lasting bathtub restoration solution.
- Ease of installation: Installing an acrylic insert is a relatively simple process. The insert is custom-made to match the size and shape of your existing bathtub, ensuring a perfect fit. The installation typically involves measuring the dimensions of your bathtub, cutting the insert to size, and securing it in place using adhesive or clips. With proper installation, the acrylic insert will blend seamlessly with your bathtub, giving it a fresh and rejuvenated look.
- Affordability: Compared to other restoration options, such as refinishing or replacing the entire bathtub, using an acrylic insert is a cost-effective solution. While the exact cost may vary depending on the size and complexity of the installation, it is generally a more budget-friendly option. Additionally, the installation process is quicker, reducing labor costs and minimizing disruption to your bathroom.
Overall, an acrylic insert offers numerous benefits for bathtub restoration. Its durability, easy installation process, and affordability make it a popular choice among homeowners. Whether you want to update the look of your bathtub or fix minor issues such as cracks or stains, opting for an acrylic insert can provide a durable and aesthetically pleasing solution.
Comparing an insert and other methods of restoration
When it comes to restoring an old bathtub, there are multiple options available. One popular choice is using an acrylic insert, but it’s important to consider other methods as well to ensure the best solution for your specific needs.
An acrylic insert is a pre-formed piece that is custom-made to fit over the existing bathtub. Its purpose is to provide a new, smooth surface and help solve any existing problems such as cracks and scratches. The installation process involves removing the old enamel layer and attaching the insert securely to the bathtub’s surface.
One of the key advantages of using an acrylic insert is its ease of installation. It can be quickly and easily fitted onto the existing tub, without the need for extensive renovations. The insert will be a perfect fit due to its precise dimensions, leaving no gaps or edges that can become a breeding ground for bacteria.
Another benefit of using an acrylic insert is its durability. Acrylic is a strong material that can withstand daily use and resist staining, chipping, and fading. It provides a long-lasting solution that will retain its appearance and functionality for years to come.
However, it’s essential to compare an insert with other restoration methods to make an informed decision. One commonly used alternative is the application of enamel over the existing bathtub. Similar to an insert, this method covers the old surface to provide a smoother finish. However, it may not be as durable as an acrylic insert and can wear off over time.
The choice between an insert and other restoration methods, such as resurfacing or reglazing, depends on the specific condition of your bathtub and your desired outcome. Resurfacing involves applying a new layer of enamel onto the existing tub, which can address minor problems but may not provide a completely new look. Reglazing, on the other hand, involves stripping off the old enamel and applying a new layer, which may be a more extensive process and require professional assistance.
In summary, an acrylic insert offers a convenient and durable solution for bathtub restoration. However, it’s important to consider other methods and weigh their pros and cons before making a decision.
- An acrylic insert is easy to install and provides a custom-fit solution.
- Acrylic is a durable material that resists stains, chips, and fading.
- Other methods, such as resurfacing and reglazing, may offer alternative options but have their limitations.
By comparing different restoration methods, you can choose the option that best suits your specific needs and budget.
Few words about the disadvantages of acrylic liners
Acrylic liners are a popular choice for bath refurbishment due to their durability, ease of installation, and attractive appearance. However, like any other product, they also have some disadvantages that you should be aware of before making a decision to install one.
One of the main drawbacks of acrylic liners is that they are not as resistant to scratches and damage as the original enamel surface of the bathtub. Over time, the acrylic can become worn and may require replacement or repair. Additionally, the acrylic material is not as strong as cast iron or enamel, which means it may not withstand excessive weight or impacts, leading to cracks or other damage.
Another disadvantage of acrylic liners is their limited range of sizes. Unlike traditional bathtubs that come in various sizes to fit different bathrooms, acrylic liners are usually available in standard sizes, making it challenging to find a perfect fit for your specific needs. This can result in gaps or uneven spaces between the liner and the surrounding walls or floor.
During the installation process, it is crucial to ensure that the acrylic liner is securely attached to the bathtub. Improper installation can lead to leaks, mold growth, and other issues. Additionally, the liner may not perfectly match the dimensions of the bathtub, resulting in visible gaps or overhangs that can be difficult to seal effectively.
Caring for an acrylic liner also requires some special measures. For instance, using abrasive cleaners or scrub brushes can damage the surface of the liner, causing it to lose its glossy appearance. It is essential to use gentle cleaning products and soft cloths to maintain the integrity of the acrylic.
Despite these disadvantages, acrylic liners remain a popular choice for many homeowners due to their affordability, ease of installation, and resistance to stains and fading. By understanding the limitations of acrylic liners and taking proper care of them, you can enjoy a beautiful and functional bathtub for years to come.
Selecting Acrylic Liners by Size and Shape
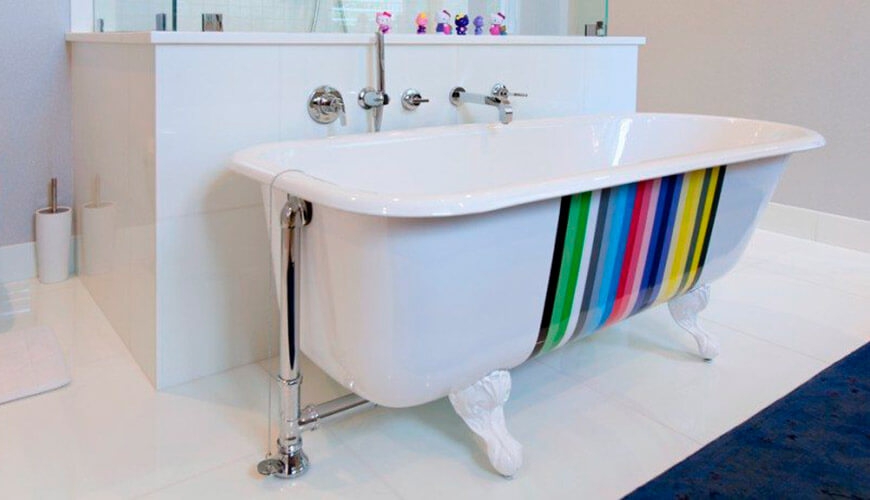
Choosing the right acrylic liner for your bathtub is crucial to ensure a proper fit and a seamless installation. When selecting an acrylic liner, you need to consider both the size and the shape of your existing bathtub. Here are some important points to keep in mind:
Size: Measure your bathtub carefully to determine its dimensions. Acrylic liners are available in various sizes to fit different standard bathtub measurements. Make sure to select a liner that matches the length, width, and depth of your bathtub. Remember, it’s better to choose a liner that is slightly smaller than your bathtub than one that is too big.
Shape: Acrylic liners come in different shapes, including rectangular, oval, and corner-shaped. Choose a liner that matches the shape of your bathtub to ensure a proper fit. If you have a unique or custom-shaped bathtub, you may need to order a liner that can be customized or cut to fit your specific shape.
Installation: Installing an acrylic liner is a straightforward process that can be done by a professional or as a DIY project. To install the liner, you’ll need to remove any old enamel or metal finish from your bathtub to create a smooth surface for the adhesive. Apply the adhesive according to the manufacturer’s instructions and press the liner firmly into place. Use foam or silicone sealant to fill any gaps between the liner and the bathtub. Finally, make sure to let the adhesive and sealant cure completely before using the bathtub.
Advantages of Acrylic Liners: Acrylic liners offer several advantages over other types of bathtub liners. They are durable, lightweight, and offer a high level of resistance to scratches and stains. Acrylic liners also retain heat better than cast iron or steel bathtubs, making for a more comfortable bathing experience. Additionally, acrylic liners are easy to clean and maintain, requiring only mild cleaning solutions and non-abrasive tools.
Differences from Metal Inserts: Acrylic liners differ from metal inserts in terms of their material and installation process. While metal inserts are typically made of steel or cast iron and require welding or fastening to the existing bathtub, acrylic liners are made of a solid sheet of acrylic that is molded and shaped to fit your bathtub perfectly. This makes the installation process for acrylic liners much simpler and less time-consuming.
Conclusion: When looking to replace your old bathtub or enhance its appearance, choosing an acrylic liner is a cost-effective and convenient solution. By carefully considering the size and shape of your bathtub, you can ensure a proper fit and a seamless installation. Acrylic liners offer numerous benefits, including durability, ease of maintenance, and a comfortable bathing experience. With the guidance of a specialist or the use of comprehensive instructions, you can easily select and install the perfect acrylic liner for your bathtub.
What to Use for Attaching the Acrylic Insert — Mounting Foam or Sealant?
When installing an acrylic insert in your bathtub, you may be wondering how to properly secure it to ensure a long-lasting and secure installation. There are two main options for attaching the insert: mounting foam and sealant. Each method has its advantages and considerations, so it’s essential to choose the right one for your specific application.
Mounting Foam:
The use of mounting foam is a popular choice for securing acrylic inserts due to its excellent adhesion and stability. The foam expands and sets within the gaps, creating a rigid and solid bond between the insert and the bathtub. This method provides superior durability, ensuring that the insert stays in place even with frequent use and water flow. It also helps to prevent water leakage, ensuring a watertight seal. Additionally, mounting foam offers insulation properties, which can help improve the overall thermal efficiency of the bathtub.
Sealant:
An alternative option for attaching the acrylic insert is to use sealant. Sealant is a flexible material that provides a strong and reliable bond. It is ideal for applications where there is a need for some flexibility, such as when the bathtub is not perfectly flat or if there is potential movement or vibration. Sealant also offers excellent resistance to water and moisture, preventing any water penetration around the edges of the insert. However, it may not offer the same level of rigidity and stability as mounting foam.
Choosing the Right Method:
When deciding between mounting foam and sealant for attaching your acrylic insert, consider the following:
- The condition of the bathtub’s surface
- The desired level of rigidity and stability
- The potential for movement or vibration
- The need for insulation properties
- The ease of installation
It’s essential to read the manufacturer’s instructions and recommendations for the specific product you are using and follow them carefully to ensure proper installation. Some manufacturers may provide video instructions with detailed explanations of the installation process.
In conclusion, both mounting foam and sealant are viable options for attaching acrylic inserts in bathtubs. Consider the specific requirements of your installation and choose the method that best suits your needs, ensuring a secure and long-lasting attachment.
Preparing the bathtub for the installation of an acrylic insert
When it comes to installing an acrylic insert in a bathtub, proper preparation is key to ensure a successful installation. Acrylic inserts are a popular choice for homeowners looking to renovate their bathrooms, as they offer a cost-effective and durable solution. However, there are certain steps that need to be taken to ensure a seamless installation process.
Firstly, it is important to measure the dimensions of the bathtub accurately. Acrylic inserts come in a variety of sizes and shapes, so it is crucial to choose one that fits your bathtub perfectly. Taking accurate measurements will help you select the right insert and avoid any issues during the installation process.
Before installing the acrylic insert, the bathtub needs to be thoroughly cleaned and dried. Any soap scum or dirt should be removed to provide a clean surface. Additionally, the surface should be free from any chips or cracks. If there are any damages, it is advisable to repair them before proceeding with the installation.
In some cases, the existing bathtub may have a enamel, which is a smooth layer of material. In such cases, the surface should be sanded to create a rougher texture. This will allow the adhesive to bond properly with the surface. Alternatively, if the bathtub is made of cast iron or another material that does not have a smooth surface, sanding may not be necessary.
Once the bathtub is fully prepared, the next step is to apply a layer of adhesive or sealant along the perimeter of the bathtub. This will ensure a secure bond between the acrylic insert and the bathtub. It is important to use a sealant that is specifically designed for use with acrylic materials, as other types of sealants may not provide a strong enough bond.
After applying the adhesive, carefully place the acrylic insert into the bathtub, making sure to align it properly. Apply pressure evenly across the entire surface to ensure a secure fit. To further enhance the bond, foam strips can be placed between the insert and the bathtub to provide additional support.
Finally, it is important to allow sufficient time for the adhesive to dry before using the bathtub. Follow the manufacturer’s instructions for the recommended drying time. Once the adhesive has fully cured, the bathtub is ready to be used.
In conclusion, preparing the bathtub for the installation of an acrylic insert requires attention to detail and specific steps to ensure a successful outcome. Proper measurement, cleaning, and application of adhesive are essential for a secure and long-lasting installation. By following these steps, homeowners can enjoy the benefits of an acrylic insert in their bathroom for years to come.
Installation Technology for Bath Insert
When choosing an acrylic bath insert, it is important to consider the installation process. The technology used for installing inserts in a bath differs slightly from the installation of other materials, such as cast iron or enamel. In this article, we will discuss the steps involved in installing a bath insert and why acrylic inserts are a popular choice.
Acrylic bath inserts are known for their high durability and resistance to chemicals and impacts. They are also lightweight, which makes them easier to install. Before starting the installation process, make sure that the existing bath is clean and in good condition. It is also necessary to measure the size of the bath carefully to ensure a proper fit.
The first step in installing an acrylic bath insert is to prepare the surface. The edges of the existing bath should be sanded down to create a smooth and even surface for the insert. Any sharp corners or edges should be rounded off to prevent any potential problems later on.
Once the surface is prepared, apply a layer of adhesive or silicone caulking to the edges of the bath. This will help to secure the insert in place and prevent any water leakage. Carefully place the acrylic insert into the bath, making sure it fits snugly. Apply even pressure to ensure a proper bond between the insert and the bath.
Next, secure the insert in place using brackets or fasteners. These can be attached to the underside of the bath or to the walls surrounding the bath. Make sure the insert is level and properly aligned before tightening the brackets or fasteners.
After securing the insert, allow it to cure and dry completely. This may take several hours or even overnight. Once the insert is fully cured, it is ready to be used. The surface of the insert can be cleaned with mild soap and water.
Acrylic bath inserts have several advantages over other materials. They are more resistant to scratches and chips, and they retain heat better than metal or enamel. Acrylic also has a smoother surface, making it easier to clean. Additionally, acrylic inserts are available in a wide range of colors and designs, allowing for more customization options.
In conclusion, the installation of an acrylic bath insert involves several steps, including surface preparation, adhesive application, insert placement, and securement. Acrylic inserts are a popular choice due to their durability, resistance to chemicals, and ease of installation. By following these steps and considering the advantages of acrylic, you can ensure a successful and long-lasting bath insert installation.
Step 1 — Fitting the Insert Dimensions
Before installing an acrylic insert in your bathtub, it is essential to properly measure and fit it to ensure a secure and seamless installation. Here are the steps to follow for this stage:
- Start by cleaning the surface of the bathtub thoroughly. Remove any dirt, grime, or old caulk using a suitable cleaner or solvent.
- Measure the dimensions of your bathtub accurately to choose the right size for the acrylic insert. Take measurements at multiple points to ensure accuracy.
- If the dimensions of the insert do not match those of your bathtub, you may need to trim it to fit. To do this, use a fine-toothed saw or a jigsaw to carefully trim the insert along the marked lines. Take your time to ensure a precise fit.
- Once the insert is properly trimmed, test it in the bathtub to check if it fits snugly. The insert should cover the entire surface and fit securely without any gaps.
- If the insert fits correctly, mark the position of the drain hole and overflow hole on the insert using a marker. Then, carefully remove the insert from the bathtub.
- Apply a layer of silicone adhesive or a suitable sealant around the perimeter of the bathtub where the insert will be placed. This will create a watertight seal and prevent any leaks.
- Place the insert back into the bathtub, aligning it with the drain hole and overflow hole. Press it firmly against the surface to ensure proper adhesion.
- Use clamps or weights to hold the insert in place while the adhesive dries. Follow the manufacturer’s instructions for the recommended drying time.
- After the adhesive has fully dried, remove the clamps or weights and check for any gaps or areas that need additional sealing.
- Seal any gaps or joints with silicone caulk or a suitable waterproof sealant. Smooth out the caulk or sealant with a caulk smoothing tool or your finger for a neat and finished look.
Following these steps for fitting the insert dimensions will ensure a proper and secure installation. It is important to pay attention to detail and take the necessary time to achieve a precise fit.
Step 2 — Installation and Fixing of the Insert
When it comes to the installation of an acrylic insert in your bathtub, there are a few things to keep in mind to ensure a proper fit and stability. Here are the steps to follow:
- Measurements Matter: Before choosing an acrylic insert, it is crucial to measure the dimensions of your bathtub accurately. The insert should be slightly smaller than the inner perimeter of the tub to allow for a snug fit.
- Preparing the Surface: Thoroughly clean the surface of the bathtub to remove any dirt, grime, or soap scum. This will ensure better adhesion of the acrylic insert.
- Test the Fit: Prior to applying any adhesive, test the fit of the insert in the bathtub. Make sure it sits securely and evenly along the edges.
- Applying the Adhesive: Apply a generous amount of adhesive along the bottom of the acrylic insert, following the manufacturer’s instructions. Then, carefully place the insert into the bathtub, pressing it firmly against the surface.
- Securing the Insert: To provide additional stability, use clamps or weights around the perimeter of the insert until the adhesive fully cures. This will help ensure a tight bond.
- Drying Time: Allow the adhesive to dry completely according to the instructions provided. Avoid using the bathtub during this time to prevent any damage to the newly installed acrylic insert.
- Final Touches: Once the adhesive has cured, remove any clamps or weights and clean the surface of the insert. Inspect for any gaps or uneven areas and adjust if necessary.
It’s worth noting that the installation of acrylic inserts differs from metal ones due to the characteristics of the acrylic material. Acrylic inserts are lightweight and easier to handle, making the installation process more manageable. They also offer higher resistance to chipping and cracking compared to enamel inserts.
However, it is essential to remember that acrylic inserts may require professional installation depending on the complexity of the project. If you are unsure about installing the insert yourself, it’s best to consult a specialist to ensure a proper and secure fit.
Step 3 — Finishing Steps After Installation
After installing the acrylic insert, there are a few finishing steps that should be taken to ensure the proper fit and function of the insert.
First, before installing the insert, it is important to select the right size and shape of the insert. Measure the dimensions of your bathtub and choose an acrylic insert that matches those measurements. It is also worth considering any additional features or options that the insert may have, such as a overflow drain or a built-in seat.
Once you have selected the right insert, the next step is to prepare the surface of the bathtub. Make sure it is clean and free of any dirt or debris. If the surface is rough, you may need to sand it down to create a smooth surface for the insert to adhere to.
Before installing the insert, it is also worth considering applying a layer of enamel to the surface of the bathtub. This will provide added protection and durability to the acrylic insert. Apply the enamel in a thin, even layer, and allow it to dry completely before proceeding.
Next, you can begin the installation process. Follow the manufacturer’s instructions for the specific insert you have chosen. In general, the insert will be attached using a combination of adhesive and screws. Apply a bead of adhesive around the perimeter of the insert and place it into the bathtub, pressing down firmly. Secure the insert in place by screwing it into the edges of the bathtub.
Once the insert is installed, allow it to cure for the recommended period of time. This is typically a few hours or overnight. During this time, make sure that the insert is not disturbed or subjected to any weight or pressure.
After the insert has cured, you can proceed with the final steps of the installation. This may include attaching any additional features, such as the overflow drain or the built-in seat, according to the manufacturer’s instructions.
Finally, it is important to clean and maintain the acrylic insert properly. Follow the manufacturer’s guidelines for cleaning and avoid using any abrasive cleaners or materials that could scratch the surface of the insert.
By following these steps, you can ensure that your acrylic insert is properly installed and will provide years of use and enjoyment. Remember to consult the manufacturer’s instructions for your specific insert and seek professional assistance if needed.
Video instruction with specialist explanations
Installing an acrylic insert in your bathtub may seem like a daunting task, but with the right guidance, it can be a straightforward process. In this video instruction, a plumbing specialist will walk you through the steps and provide detailed explanations.
Step 1: Measure and purchase the correct size of the acrylic insert. Pay attention to the specific dimensions of your bathtub to ensure a proper fit.
Step 2: Prepare the surface of the bathtub by cleaning and removing any old enamel or material. Use a suitable cleaner to remove any dirt or grime that may affect the adhesion of the acrylic insert.
Step 3: Apply a layer of adhesive or silicone sealant to the surface of the bathtub. This will help create a smooth and even base for the acrylic insert to adhere to.
Step 4: Carefully place the acrylic insert onto the bathtub, ensuring it aligns properly with the edges. Use clamps or straps to hold it in place while the adhesive or sealant dries. Follow any specific instructions provided by the manufacturer.
Step 5: Attach the drain to the acrylic insert. Depending on the specific design, this may involve connecting the drain pipe or using a different attachment method. Consult the manufacturer’s instructions for guidance.
Step 6: Allow the adhesive or sealant to cure and dry completely. This typically takes several hours, so be patient and avoid using the bathtub until it has fully set.
Step 7: Once the adhesive or sealant has dried, test the installed acrylic insert by filling the bathtub with water. Check for any leaks or issues with the installation and make any necessary adjustments.
After completing these steps, your bathtub should have a new acrylic insert that looks and functions like new. Acrylic inserts offer several advantages over traditional enamel or cast iron materials, such as being easier to clean and resistant to chipping or discoloration. They are also more cost-effective and can be easily replaced if needed.
Remember to follow the specific instructions provided by the manufacturer of your acrylic insert, as different products may have slight variations in installation procedures.
Видео:
НЕ Покупай Ванну Пока Не Посмотришь ЭТО!!!
НЕ Покупай Ванну Пока Не Посмотришь ЭТО!!! de Перфоратор 1.544.929 visualizaciones hace 5 años 8 minutos y 15 segundos


